Football/Soccer Session (Academy Sessions): Attacking Through Zone 14 with 2-3-1 (Start Time: 13-Jan-2016 18:00h)

Profile Summary

| Name: | Matt Gray |
|---|---|
| City: | Hull |
| Country: | United Kingdom |
| Membership: | Adult Member |
| Sport: | Football/Soccer |
See the guidance at the top of this page to understand why you are not seeing interactive Football/Soccer images.

Learning Objectives

|
Technical Receiving, passing, dribbling, shooting. |

|
Tactical Movement to create space for self/others, Creating and identifying opportunities to penetrate defence. When/where to retain v penetrate |

|
Physical Agility, Balance, speed, |

|
Psychological creativity, teamwork, concentration, discipline |

|
Social communication |
See the guidance at the top of this page to understand why you are not seeing interactive Football/Soccer images.

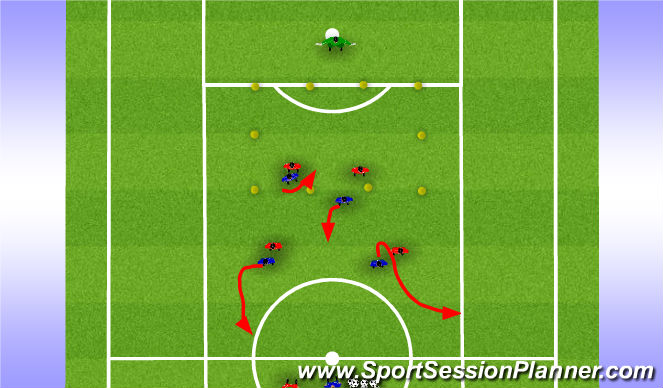
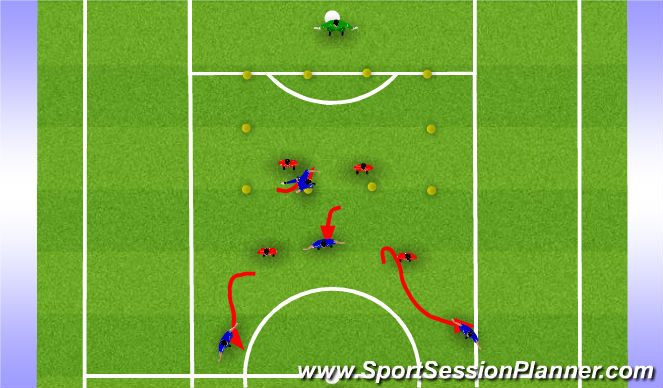
Zone 14 attack - Function - 1st movements
Movements
CM movement away to create space to come short and receive, half turned to open up playing forwards.
Movement wider, gives Red CM a problem to come with you or protect the centre.
9 + 10 movement. #9 running in behind poses immediate danger in behind which may stretch defence, creating spce for #10 who drops short. If CB comes with him, space for ball in behind straight to #9, or in behind via combination of bounce from #10. If defender stays, and CM have gone with players, ball straight in to #10. Threat of #10 may mean CM stay central and our CM get on the ball turned, in space and can now attack.
See Example scenarios...
Position of #9/#10 can be interchangeable, but one must always look long and one short to create the depth of the attack, if both make the same run, it is easy to defend.
Cm must look to make runs off #10 when he receives, but also be aware to give balance, and not both go forward at once.
See the guidance at the top of this page to understand why you are not seeing interactive Football/Soccer images.

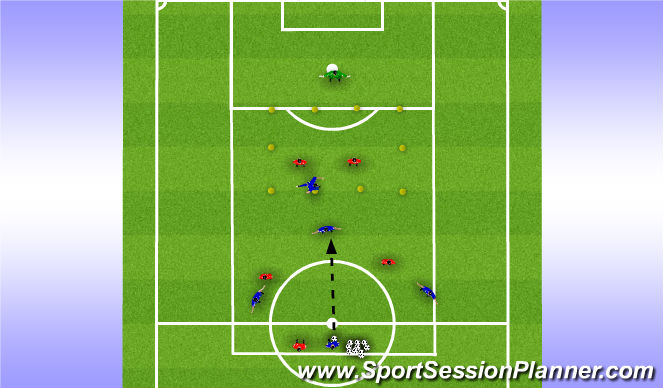
Zone 14 attack - Function - Scenario 1
CB drop off for threat of #9 in behind, CM follow runners, space for #10 to get on the ball,
He can turn and drive into zone 14, cm can spin off for pass, if not pressed can maybe shoot, if pressed can look at threading in #9
See the guidance at the top of this page to understand why you are not seeing interactive Football/Soccer images.

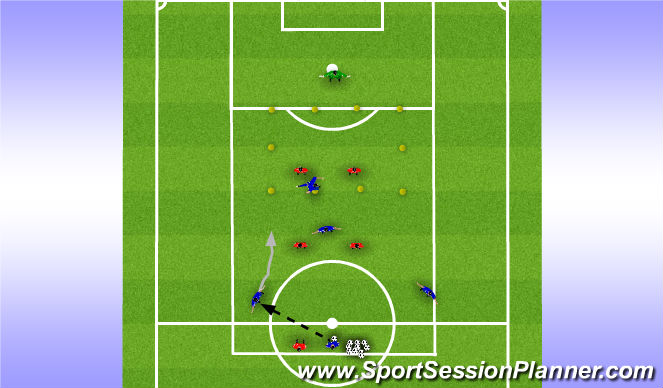
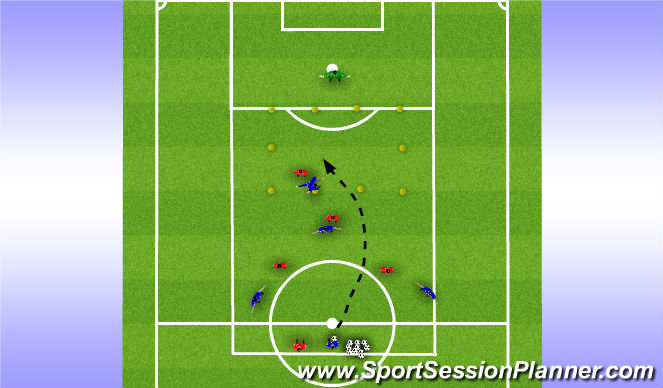
Zone 14 attack - Function Scenario 2
CB drop for threat of #9, so CM hold central ground to cover #10.
Pass goes into cm in space and turned,
Now if pressed can maybe find #10/#9 or if not can run at midfiled to commit them and create opportunities
See the guidance at the top of this page to understand why you are not seeing interactive Football/Soccer images.

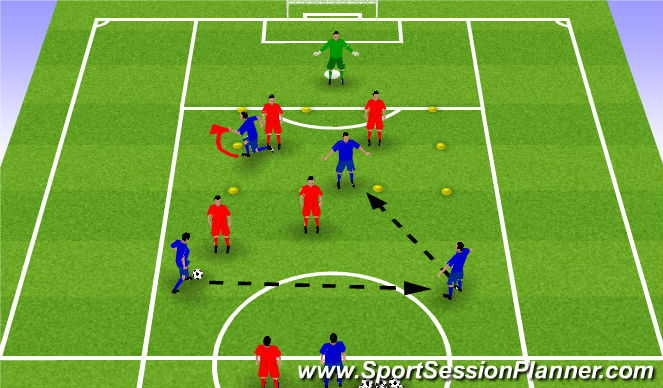
Zone 14 attack - Function Scenario 3
CM cover runs, CB pushes up on #10, Blue CB can look straight in behind for #9
See the guidance at the top of this page to understand why you are not seeing interactive Football/Soccer images.

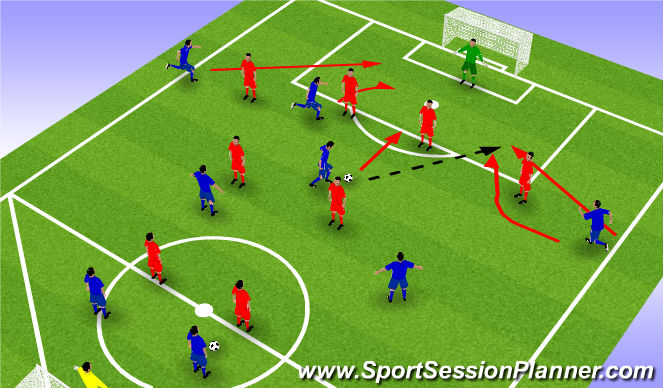
Zone 14 attack - Function CM on ball
CM recieves and carries forward, drawing opposing CM, run of #9 in behind causes threat for defence. CM covers line pass, causing either a hole for ball to be fed into #10, or as above, other CM is drawn over, and a quick combination with the other CM gets #10 on the ball in zone 14.
Now on the ball, #10 can turn, or if tightly marked, can bounce back to CM, to play in #9
See the guidance at the top of this page to understand why you are not seeing interactive Football/Soccer images.

Zone 14 attack - SSG
Key Factors
Now to work on wide players movement, on, around and away from the ball.
Start position, hugging the touchline, to create space in zone 14, for other players. Attempt to drag full backs wider.
If full backs are not initially tempted wide, moving the ball wide and back central, retaining possession and manouvering defenders, may acheive desired affect.
Once we have worked to get #10 on the ball in zone 14, as in the function. Wide players runs should be for the ball thread in between full back and centre back, either darting in front of the full back, or around the back on his blind side. By staying really wide initially, we should be able to make the run blind to the defender.
As one wide player gets in behind, the opposite wide player, must attack the far post, for the cross or any rebound off the goal keeper,
When Wide player recieves the ball wide, CM must back him up to give an option for ball retention. While #9/10 can make run inside full back for penetrative option, If #10 makes run in behind full back, #9 makes run for cross across the '2nd 6 yard box', opposite winger, has to be available for cut back, and fills #10s position. If wide player makes far post run for the cross, the #9 hold the penalty spot/edge of area for cut back, so player on ball always has 2 options, and defenders have 2 problems.
Organisation
Introduction of wide players in to SSG.
9 v 9, pitch tapered off where Blue FB/ Red Wingers would be
Flat discs taken out,


 Play animation
 Play step-by-step
 Repeat (toggle)
 Full Screen
 Pause
Pause Stop
Stop
Zone 14 attack - Function Set Up
Key Factors
Width and depth of attacking, movement to lose defender/create space.
Movements to create space for others
quick combination play
Organisation
Balls with Blue CB, who will feed in and game starts
Attacking objectives - Get #10 on the ball in zone 14, create shooting opportunities in zone 14, create scoring opportunities from passes from in zone 14, SCORE
Defending objective - Win ball back, hit target man early.